Tuesday, December 29, 2015

Easy Exercises for Better Balance

It’s that time of year where we start walking in a winter wonderland. This winter wonderland is great for the holiday season, but with winter also comes snow and ice. Losing your balance in these conditions can lead to slipping and falling and possible injuries. Luckily, there are exercises you can do to help train your balance and avoid sliding around! Here are a few:

Stand on One Foot

Stand near the wall, a rail, or the back of a chair. Staying tall, stand on one leg. Start with 20 second intervals and work your way up. You can start with holding on, but try to use only fingertips and eventually using no hands once you are ready. For an added challenge, try standing with your eyes closed.


Tandem Walk

Walk heel to toe. Try not to look down at your feet!


Half Roll Exercises

Step Forward and Backward

This can also be done while doing the tandem walk. Stand on the half roll with one foot in the middle. Step forward, shifting your weight. Then step backward. Try not to look down. This can be done close to a wall, but try to work your way to not using your hands. Make sure you are focusing on shifting your weight! Switch which foot is in the middle as well.


Squat and Touch

Stand on the half roll with one foot in the middle. Step forward and slowly squat down. Try to touch your knee first, then stand back up. Once you feel comfortable, try squatting down and touching your shin or the insole of your foot. This can also be done stepping backward on the half roll.


Leg Swing

Stand with one foot in the middle of the half roll. Simultaneously swing the other leg forward with the opposite arm (I.e. swing left leg with right arm). Then swing the leg back, again coordinated with the opposite arm. Stand tall, leg the swing come from the hip not the knee. Make sure to switch the leg you stand on.


Blog post by Nikki Courtney.

Tuesday, December 8, 2015

DOMS: That Day After the Gym Feeling

Ever go to the gym and wake up the next day feeling like you can’t move? That sore- wow I worked out hard yesterday- feeling? Well, you can thank DOMS for that.

DOMS stands for delayed onset muscle soreness. The science of why DOMS occurs isn’t exact, but a lot of research points to the major cause being microtrauma to the muscle being worked. This is especially true in exercises that require a lot of eccentric muscle contractions, or the “lengthening” of the muscle being worked. Typically this soreness is felt 6-8 hours post-exercise but the effects can be felt for up to 48 hours (Levy, 2015).  DOMS is not caused by a buildup of lactic acid or metabolic waste in the body as many believe. “DOMS appears to be a product of inflammation caused by microscopic tears in the connective tissue elements that sensitize nociceptors and thereby heighten the sensations of pain (Schoenfield & Contreras, 2013).”

It’s a common misconception that being sore after a workout means that you will gain muscle. DOMS is not an indicator of hypertrophy (building muscle size). In fact, there are really 3 factors for hypertrophy to happen: mechanical tension, metabolic stress, and muscle damage (Levy, 2015). What does this all mean in the long run? DOMS indicates that there is damage done to the muscle which, although necessary in building muscle mass, does not mean that you are. Being too sore can cause you to take more rest time, becoming very counterproductive. “First, severe soreness can significantly decrease force-producing capacity, which will be detrimental to performance in subsequent workouts. Second, motivation levels can take a hit when you’re hindered by crippling muscle soreness (Levy, 2015).”

Being sore is normal. Being so sore you cannot move is not. Make sure you aren’t overtraining and your exercise regimen is suited for your goals. If you are not sure, seek the help of a trainer. Remember- train smart!

Blog post by Nikki Courtney.


References
Levy, W. DOMS: The Good, the Bad, and What It Really Means to Your Training (Breaking Muscle). http://breakingmuscle.com/strength-conditioning/doms-the-good-the-bad-and-what-it-really-means-to-your-training. (2015)


Schoenfeld, B.J. and Contreras, B.  “Is Postexercise Muscle Soreness a Valid Indicator of Muscular Adaptations?Strength and Conditioning Journal, vol. 35 No. 5 pp. 16-21 (2013)

Friday, November 27, 2015

Improve Your Mood... Move It!

Everyone has those days where you feel like you are one with your mattress. Finding the energy and motivation to get up and get going for the day can be hard. Did you know that exercise can actually help lift your spirits, help you get more sleep, and have more energy? 

You just have to get up and go!


Exercise has a multitude of benefits for your physical health but many don’t realize that exercise is an excellent tool to improve your cognitive and mental health. This is important for people of all ages. “One study examined over 10,000 Harvard University alumni over the course of over 20 years and found that rates of depression over time were linked to the amount of physical activity that these alumni reported. Likewise, in a study of adolescents, 16% of those who were not physically active developed an anxiety disorder over a 4-year period, compared to half that rate among those whose who exercised regularly (Otto & Smits, 2011).”

In addition to exercise improving mood, exercise can improve the overall quality of sleep. The National Sleep Foundation recently found that regular exercise can improve sleep quality by up to 65%. There are also benefits to less leg cramps and increased concentration during the day just by exercising regularly (National Sleep Foundation, 2015). “Our findings demonstrate a link between regular physical activity and perceptions of sleepiness during the day, which suggests that participation in physical activity on a regular basis may positively influence an individual’s productivity at work, or in the case of a student, influence their ability to pay attention in class (National Sleep Foundation, 2015).” These findings are based off of the American College of Sports Medicine (ACSM) Guidelines for Physical Activity. Too much exercise can have the reverse effect so don’t over train!

What does all this mean? 

Essentially, by exercising you can be in a better mood, feel more awake, and sleep better at night. This is in addition to improving your physical health as well. Make sure you keep moving- your body and your mind will thank you!

Blog post by Nikki Courtney.


Reference
National Sleep Foundation. (2015). Study: Physical activity impacts overall quality of sleep. Retrieved from https://sleepfoundation.org/sleep-news/study-physical-activity-impacts-overall-quality-sleep

Otto, M., & Smits, J. (2011). Exercise for mood and anxiety proven strategies for overcoming depression and enhancing well-being. New York, NY: Oxford University Press.


Monday, November 16, 2015

A Pound is a Pound

The human body is an amazing thing. Physiologically, there are so many things that happen in unison that keep us alive. Muscles, bones, and fat are three major components of the body. We need all three to survive, including fat. Having too much or too little of any of these things can lead to a multitude of health issues. So how can you find out how much you have?

First, let's look at body composition. Body composition is essentially how much muscle, bone, fat, and water compose the body. For body composition, it is more of a comparison of fat free mass, or lean mass, to fat mass. Everyone's body composition is different. For example, women tend to have a higher percent of fat than men of the same age for a number of reasons (i.e. childbearing, hormone regulation). As you age, body composition changes as well (i.e. muscle atrophy).

Body mass is different from body composition. Instead of looking at lean mass vs fat mass, it is more of a ratio. Body mass index (BMI) is a comparison of total body weight to height; it does not look at the composition of the body but the sum of all its components. Many healthcare professionals and fitness experts use BMI to find a correlation for body fat. This height to weight ratio gives an estimate for percent body fat. Once found, it can be compared to a chart which takes into consideration your age and gender to see if it is a “healthy” percent. This can be a great tool for much of the general population. But because BMI isn't considering how much of the total body weight is fat and how much is muscle, etc., it is not always reliable. Take a professional body builder, for example: lots of muscle, very little body fat. According to their BMI, they can sometimes fall under the “obese” category simply because of their height to weight ratio.

One common misconception I’ve heard is that muscle weighs more than fat. This isn’t entirely true; a pound is a pound no matter what. What this is referring to is actually the difference in density. Muscle is more dense than fat is. Simply put, a pound of muscle takes up less space in the body than a pound of fat does. This is important to understand when you look at total body weight.

When you get on a scale, it tells you a total body weight. If you are eating correctly and exercising to lose weight, try not to rely on the numbers on the scale for progress. You could be losing body fat and gaining muscle but weigh exactly the same. Take a look at yourself in the mirror- how are your clothes fitting? How are you feeling? These are better for determining progress than a number on the scale. This can happen in reverse too; you can lose muscle and gain fat, essentially weighing the same but physically look “bigger.”

If you are interested in finding out your body composition, contact your doctor or a facility that conducts body composition testing. Remember, if you feel better, that is the most important thing! Don’t compare your progress to anyone else or a quantitative number because it isn’t always reliable.


Blog post by Nikki Courtney.

Monday, November 2, 2015

5 Tips to Help You Stay Motivated


Some people dread the word ‘exercise.’ Thinking about purposefully going to the gym can be very intimidating. Too often people will find every excuse in the book not to go to the gym. “I’m too tired,” “I don’t have enough time,” or my personal favorite “I don’t want to get sweaty.”

Motivation is hard to come by, but figuring out what motivates you is the key to getting moving. There are two major types of motivation- intrinsic and extrinsic. Intrinsically motivated individuals can find it within themselves to go get stuff done. The drive and need to workout is very self propelling. Extrinsic motivation is an outside source helping to push you in the right direction. This could be as simple as having a trainer encourage and push you or having a reward to work towards. To be the most successful, try to find motivation in both.

Make a plan

Having a plan of action helps keep you on track. This is the same idea as going grocery shopping. Most people will make a shopping list and go to the store and buy what they need. Going into the grocery store with no list usually means missing some items and buying impulse foods. Make sure you have a plan. How many days a week do you want to workout? For how long? Are you going to the gym, a fitness class, going for a run, swimming, dancing? Plan it out and stick to it!

Have an end goal

What’s the point of making a plan if its not working towards something? This could be as simple as “if I run 3 miles today, I’ll allow myself a treat tonight” to “I want to lose 10lbs for a special event in 3 months.” Making a plan is much easier when you know what you’re working towards.

Tell people about your plans and your goals

The more people that know what you’re working towards, less you will get off track. Talk to your family and friends. Share your goals and achievements with them. It will be more rewarding and you will have to be more accountable.

Learn time management skills

Make exercise and physical activity apart of your day, not something that you will get to if you have time. After a while exercise should feel like a part of your routine and you will feel strange not doing it.

Make it fun

The steps in your plan and your end goal should be realistic. If you have never run before and you want to train for a marathon, don’t start 4 weeks before. It will not be fun that way. Remember, you are doing this for yourself. Really sit down and figure out what makes you happy and what you enjoy doing. If the activities are fun, then it's one more reason to do it! The goal is yours, the reward is yours, so make sure you enjoy yourself!


Blog post by Nikki Courtney.

Thursday, October 29, 2015

Halloween Workout

Celebrate Halloween with this spooky workout! 

Warm up before trying any of these moves.  Begin with 10 repetitions each.  Do not perform any exercise that causes or increases pain.

Jack O’Lantern Squats
Begin in an upright position.  Take a small hop forward, landing with soft feet into a squat position, weight in your heels and arms raise parallel to the ground. Stand up, lowing arms to your side and repeat 10x.

 
Pumpkin Lift
Begin in an upright position holding a medicine ball.  Squat down and tap the floor with your medicine ball then stand up tall and reach the medicine ball overhead.  Practice good squat form keeping your knees behind your toes.  Repeat 10x.

 
Monster Walks
Tie a theraband around your legs, just above your knees.  Begin in an athletic stance with knees slightly bent and back straight.  Take big steps forward while staying in that athletic stance and keeping tension in the theraband.  Feel the burn in your glutes!

 
Double Double Toil & Trouble Leg Kicks over Bench
For the scary version of this popular Burdenko exercise, begin seated on a bench with both legs on one side.  Sit back on your tailbone, holding a pelvic tilt with your back straight.  Hold on the bench behind you for support.  Kick both legs straight over the bench together.  Tap the floor with your feet then repeat to the other side, alternating for 10 repetitions.

 
Candy Crunches
Begin by sitting on a physioball.  Walk your feet forward until the physioball rests on your upper back, shoulders and neck hanging off the physioball ball.  Keep your hipss elevated and perform a crunch with your head and neck in a neutral position. Repeat 10 repetitions.

 
Vampire V-Sit
Lay on your back holding a physioball between your feet.  Pelvic tilt pressing your lower back into the mat and lift the ball off the ground.  Pass the physioball from your feet to your hands.  Continue to lower the ball to the ground in your hands.  This is a challenging core exercise and it’s important that you only lower the ball as far as you can hold a pelvic tilt.  Continue to pass the ball back and forth for 10 repetitions.

 
BOOty Bridge
Lay on your back with your heels on a physioball.  Dig your heels into the physioball as you squeeze your glutes and lift your hips off the ground.  Hold for 2-3 seconds and lower.  Repeat 10x.

 
Spiderman Plank
Begin in a plank position. Bring your knee to your elbow (same side) while keeping your leg parallel to the floor.  Repeat on the other side, alternating for 10 repetitions.

 
Black Cat/Camel
Finish up your workout with this stretch for mobility in your back.
Begin on all 4s (hands under your shoulders, knees under your hips).  Start with your back in a neutral position then alternate between arching your spine upward toward the ceiling (cat) and rounding your back (camel) by relaxing your back and allowing your stomach to fall towards the ground.  Repeat 10x.

Boo! 
Blog post by Jen Skiba.

Wednesday, October 28, 2015

Free Weights vs. Weight Machines

There are so many different types of equipment that can be used in an exercise program. Two of the most popular types of equipment are free weights and weight machines. But how do you know which type to use? Each has their own pros and cons, but depending on your goal one could be more beneficial than the other.

So what are free weights? Any object that is not fixed to a set of axis is a free weight. This could be a dumbbell, barbell, medicine balls, physio balls, kettle bells, ankle weights, or even your own body weight. Each of these can move through various planes in all three dimensions. Weight machines involve various combinations of pulleys, cams, and lever arms working from a set axis. A set axis means they work from a fixed range of motion.

Free weights provide a constant resistance during an exercise. It doesn’t matter the position- lifting 5lbs is lifting 5lbs. However, the weight you actually lift on a weight machine changes depending on the length of the lever arm. This can work in your favor, especially if you are recovering from an injury. The lever arm will make lifting the weight easier for a weaker joint and harder for a stronger joint. So depending on your goal, both are beneficial. Most weight machines target a specific muscle, also aiding in rehabilitation from an injury. This isn’t as beneficial if you are looking for more functional movements, though. While weight machines isolate a muscle, free weights can help you target and indirectly work other muscles. Since free weights aren’t in a fixed plane and allow for three dimensional movements, muscles have to control the movement.

Since machine weights work on a system of pulleys, it is much easier to change the weight. Usually it is as simple as putting the weight stack pin in a different slot. You don’t have to work with weight plates or moving heavy pieces of equipment. These pulleys, however, limit the amount you can adjust the range of motion. Controlling the weight with free weights requires a higher level of skill as well as balance and coordination. It is recommended, especially with any power lifting, Olympic lifting, or heavy lifting in general, that a spotter is used to ensure proper form and reduce the risk of injury. Weight machines typically do not require the presence of a spotter because of their fixed range. Also, free weights typically require a greater metabolic cost, meaning you burn more calories.  
 
 
The equipment you use in an exercise program really depends on what goal you are trying to accomplish. If you are unsure about what you should be using and/or doing, seek the help of a personal trainer or other fitness expert. A combination of both can be used to get the most out of your workouts. Just remember- safety first!
 
Blog post by Nikki Courtney.

Sunday, October 25, 2015

7 BOSU Moves for Runners

Have you ever tried exercises on a BOSU Balance Trainer?  This half-dome stability ball is great for building a strong core, ankle stability and work on overall strength, balance and coordination.  Challenge yourself by adding a BOSU Balance Trainer to your current strength routine.  Below are 7 BOSU exercises with runners in mind focusing on the lower body, glutes and core—all super important for strong, fast, injury-free running! 

Warm up before trying any of these moves.  Begin with 10 repetitions each.  Do not perform any exercise that causes or increases pain.

BOSU Squats

Stand on the BOSU Balance Trainer, dome side up. Perform a squat, keeping good form and your weight in your heels. Stand up and repeat 10x.


BOSU Lunges

Stand on the ground facing the BOSU. Take a big step forward onto the BOSU into a lunge position with knee at 90 degrees. Push off the BOSU back to the upright starting position. Repeat with the other leg, alternating for 10 repetitions.


BOSU Side Lunges

Stand on the ground next to the BOSU. Take a lateral step onto the BOSU bending that knee while keeping the other leg straight. Your weight should be in your heels with your knee behind your toes and not past your ankles laterally. Return to start position. Perform 10 repetitions then repeat on the other side.


BOSU Side to Side Push Ups

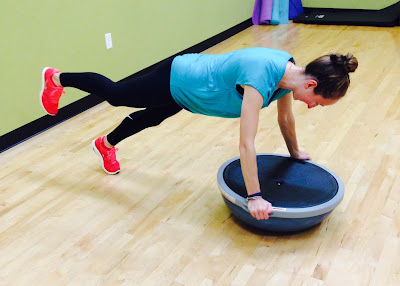
Begin in a plank position with your hands on the BOSU, dome side up. Walk one hand laterally off the BOSU and perform a push up. Walk you hands back onto the BOSU and repeat on the other side, alternating for 10 repetitions.


BOSU Plank with Leg Lifts

Begin in a plank position with your hands on the BOSU, this time with the dome facing down. Engage your glute muscles and lift one leg off the floor, foot flexed. Hold for 1-3 seconds and return to start position. Repeat with the other leg, alternating for 10 repetitions.


BOSU Plank with Mountain Climbers

Begin in a plank position with your hands on the BOSU, dome facing down. Alternate knees to chest starting slow and building to a faster pace.  Repeat 10x.


BOSU Single Leg Bridges

This exercise can be done on a BOSU with dome facing up or down. Lay on your back with knees bent and one leg on the BOSU. Lift and hold opposite leg in the air parallel with your bent knee. Engage your glutes and raise your hips off the ground. Perform 10 repetitions and repeat on the other side.


Blog post by Jen Skiba, RRCA Certified Running Coach

Monday, October 19, 2015

2 Types of Runs You Should Be Doing

Conversation Pace Run


Conversation pace running should be a staple to any training plan.  In fact 75-80% of your weekly mileage should be done at conversation pace.  So what exactly does that mean?

Think about a normal run for you.  Are you breathing heavily and struggle to get any words out?  Or are you relaxed, breathing easy and feeling good?

Conversation pace is that relaxed, breathing easily, feeling good kind of run.  It’s the pace you can run and hold a conversation or even sing a song at submaximal effort. 

Most runners tend run too hard, too often.  “If I am pushing myself to the limit every day, I will get faster in a race.  Right?”  Wrong.  High intensity running on an everyday basis will get you injured and/or burnt out very fast.   Don't get me wrong—it can also be difficult slowing yourself down but it will pay off in the long run. 

What are some benefits of a conversation pace run?
·      Increase aerobic capacity
·      Increase and improve oxygen consumption
·      Improve fat metabolism
·      Improve stamina/endurance
·      Helps the body adapt to the stress of sustained running

How can you make sure you’re not pushing yourself too hard?  At various points during your run, do a little talk test.  If you can’t spit out a sentence or two, slow it down.  Walk a little if you have to.  Chances are you’re heart rate is too high and you have crossed over into that anaerobic training zone where lactic acid starts to build up and fatigue sets in quicker.

Fartlek Run


Fartlek is a Swedish word meaning “speed play.”   A Fartlek run is just that—playing with speed!  It’s a form of interval training with fast bouts of running followed by a recovery period at conversation pace.

While there are many benefits to Fartlek training, a Fartlek run is meant to be fun.  The goal is to vary your pace (at about 70-90% effort) throughout the run and vary the time/distance of the sprinting and recovery phases.

A traditional Fartlek run uses landmarks on your route as markers.  Sprint to the next mailbox, jog two telephone poles, sprint to the next driveway, etc.  The increase in speed incorporates both the aerobic and anaerobic systems, challenging the cardiovascular system.

Running at the same pace all the time will cause a runner to plateau.  Experiment with Fartlek runs to change gears and recruit different muscle fibers.  It also helps simulate the racing experience.  Think about the small surges to pass another runner or slowing down to a walk at a water station.

What are the benefits of a Fartlek run?
·      Increase speed
·      Improve endurance
·      Build strength
·      Recruit different muscle fibers
·      Varying intensities means greater calorie burn
·      Practice and promote good running form

Fartlek running is great when you are starting to incorporate speed workouts into your training.  Make sure you have a good 4-8 weeks of aerobic base building down before you start any interval training.

Don’t forget to warm up before beginning a fartlek run!  Start with only a few repetitions in Week 1 and over time increase the number of repetitions along with increasing speed intervals while decreasing rest intervals.  Remember this is a form of interval training and a hard effort so limit to once a week—not every run!  With any interval training you want to avoid doing too much too soon.
 
Incorporate these two types of runs into your training routine & plan, progress, perform!

Blog post by Jen Skiba, RRCA Certified Running Coach.

Wednesday, October 14, 2015

The Burdenko Method: Land & Water Exercise

The Burdenko Method

Do you know what Burdenko is?
The Burdenko Method is part of the Burdenko Water and Sports Therapy Institute. Dr. Igor N. Burdenko founded the institute in 1984, focusing on the practical application of water and land exercises. He takes a holistic approach to rehabilitation, conditioning, and training which allows the method to benefit all ages and conditions. After more than 30 years of working with rehabilitation clients, training athletes in the NBA, NFL, NHL, US and Russian Olympic teams, members of the US Handicapped Olympic Team, and top international dancers and figure skaters, Dr. Burdenko has become internationally recognized in the rehabilitation and fitness worlds. The methodology works in a pyramid fashion- you must achieve the skills at the bottom of the pyramid to effectively master the skills at the top. The Burdenko Method also uses various equipment and speeds while exercising.
 

Water & Land Exercise

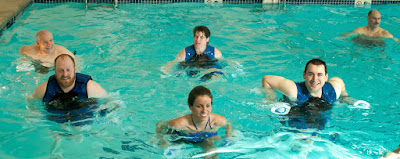
The Burdenko Method utilizes not only exercises in the gym, but in the water. What makes aquatic exercise so beneficial? Being in the water eliminates about 90% of your body weight, taking the stress of your muscles, bones, and joints. This occurs because water helps to stop the gravitational pull on the body, allowing you to move more freely than you would on land.
 
Most aquatic exercises used in the Burdenko Method are done in an upright position. By being vertical, the body’s buoyancy and posture is challenged. In turn, this helps to strengthen and stabilize the trunk, spine, and pelvic areas. Progressions to supine (on the back) and prone (face up) are also used for an added challenge. There are exercises done in shallow water as well, allowing the body to work against a gentle resistance.
Land exercises are also done progressively. Typically, one starts in a horizontal position: supine to sidelying to prone. This allows the freedom of movement from the extremities. Exercises can also be done sitting, standing, or moving dynamically. Many of the exercises can be done with or without additional equipment.
 
“Finding one's center of buoyancy and balance in deep water is the first step to experience pain free movement (Level 1). Then, by adding a combination of movements in different planes (vertical, supine, prone) in deep water and with horizontal mat exercises on land, coordination develops (Level 2). Level 3 adds challenges with different equipment and environments to increase the natural force of gravity.” “Your personal experience with Levels 1, 2, and 3 will allow you to progress to Levels 4, 5, and 6. You will develop qualities of endurance, speed, and strength.”
Blog post by Nikki Courtney.
References
Burdenko, I., & Gray, P. (2001). The Burdenko Method Exercise Guide Part 1. Wayland, MA: The Burdenko Water & Sports Therapy Institute.
Burdenko, I. (2002). Burdenko Exercise Guide Part 2. Wayland, MA: The Burdenko Water & Sports Therapy Institute.

Friday, September 25, 2015

Alignment for Squats and Lunges

Now who doesn’t do squats and lunges as a part of their workout routine?

Squats and lunges are great multi joint exercises utilizing multiple muscle groups, making them very effective and useful in a variety of exercise programs. Not only do squats and lunges strengthen, but they help with balance, stability, and can even improve your gait. Performing an improper squat or lunge, however, can result in some pretty bad pain. Unfortunately, knee pain/injuries are common, especially in women. Protecting your knees with proper alignment will allow you to get the most out of your exercises. Maintaining good form will also save your back, so pay attention!

1.     Avoid driving the knee forward; keep your weight in the heels!

·       Many have heard to “never let the knee over the toe.” This is a common phrase used by trainers and therapist. What this is really getting at is to avoid forward movements from the knee during the squat or lunge. Pressing the knee too far forward puts an anterior shearing force on the ligaments that support the knee. Try to track your knee over your little toe on the foot, this way you should still be able to see your feet and avoid excessive forward movement.

·       Do not go up on your toes! The weight- especially in a squat- should be distributed into your heels. Toes should be forward. When stepping forward into a lunge, keep the weight in the heel of the leg you are actively stepping with and in the ball of the foot on the trail leg.

2.     Keep your shins over your ankle

·       The goal is to try and keep a somewhat vertical lower leg. While it may lean slightly forward, you do not want the knee to move in a different direction than the ankle joint (ex. knees collapsing inward). The stance can be wide, narrow, or hip width on a squat so long as the knee ankle alignment is correct. For a lunge, look for a right angle from the thigh to the knee to the ankle, keeping the knee in line with the ankle.

3.     Start with a pelvic tilt first then hinge at your hips!

·       The pelvic tilt is critical to avoiding back pain and allowing activation of the powerful gluteal muscles. A pelvic tilt sets a neutral lumbar spine (low back) and from there you can hinge properly at the hips.

·       To hinge at your hips you must push your butt backward allowing the trunk to bend forward thus loading your body weight in your heels. Without a good hip hinge, you put your lower back and knees in jeopardy. The motion is almost like trying to sit in a chair behind you for a squat. A general rule for forward lean is that the hips should match the angle in your lower leg. It also facilitates equal weight distribution between legs when performing a lunge. Make sure to clear your hips once returning to the start position!

Forward Lunge


    Knee tracks over little toe, weight evenly                          Right angles at knee joints, toes forward 
distributed in front foot heel and ball of trailing foot                     shins in line with ankle joints


Squat with Counter Weight


                               Start position for most squats            Pelvic tilt and hip hinge

             Sit back on heels as if sitting in a chair              Full squat, thighs parallel to ground,
                                                                                              back and shin angles match


Follow these basic form tips and you should see improvement in your squats and lunges in no time! If you are unsure if correct form is being used, try performing the exercise in front of a mirror or a friend who can help cue you.

Blog post by Nikki Courtney.