Tuesday, December 8, 2020

Increase Cardio & Strength with 4 Simple Exercises


Remember the days when jumping, skipping and leaping on and off and over things was fun?  Well, it still can be!  Have you ever seen people at the gym or in a workout video hopping or jumping around?  Often onto or over equipment?  Did you ever wonder why so many people like to jump around for a workout?  Well, they may have a secret that you haven’t been let in on, until now.  Plyometric Training. 
 
Also known as ‘Jump Training’, Plyometric training will challenge your muscles, stability and strength as well as increase your heartrate while burning calories at a much faster rate than most exercises.  Plyometric Training stretches your muscles, followed by quick contractions that provide power.  This combination of stretching and contracting actually improves efficiency when relying on your muscles to perform, not to mention the quicker response times and power available.
 
So, why doesn’t everyone incorporate Plyometric Training into their workout routines?  Why do you need power?  First of all, Plyometric exercises are not for everyone.  If you have any issues with ankle, knee or hip joints, this may not be the best choice of exercises for you.  Speak with your doctor to learn more.  Also, if you are someone who shouldn’t increase your heartrate up to around 65-85% of your max, than you will want to stay away from Plyometric Training.  Otherwise, you should be okay to use this type of training to accompany your already established workout routine.  If you are new to Plyometric exercise you will want to start slow, learn the movements and grow into increasing rate of speed, depth in bending and build strength to power up when needed. 
 
Back to my questions…1. Why doesn’t everyone incorporate Plyometric Training into their workout routines?  The answer…Plyometric Training scares many people away.  There is a fear of leaving the ground.  Though hopping or jumping may seem scary at first, small hops and jumps should be used while getting your mind and body adjusted to leaving the ground.  Sure, there are plenty of other exercises you can do but none provide you with the same benefits that Plyometric exercises do.  Best benefit, you only need your body weight for Plyometric exercises to be effective.  That is a big plus!  Just about anyone can start easily and gradually build up to doing more (if you so choose). 
 
2.  Why do you need power?  The simple answer is that everything you probably do requires the use of your larger muscles groups (hips, upper legs and low back).  When these areas are strong and powerful, your body is more efficient in the use of your muscles as you move.  As your muscles strengthen, less strain is placed on your bones and joints, requiring less energy to complete movements such as walking, going up the stairs, bending and lifting, and so many other typical movements.  Imagine your joints not feeling the strain of such movement because the muscles that support your joints are powerful.  Ease of movement = efficient movement.
 
Plyometric Training may be exactly what you need to step up your training program.  Or, it may be the new challenge you have been seeking to mix things up in your already established workout routine.  Either way, when done properly, Plyometric Training will improve stamina, strength and your overall health and wellness.  So, what are you waiting for? 
 
Here are 4 Plyometric exercises you can start using today:
 

Side-Step Hops


A great starter to warm-up your hips and leg joints, Side-Step Hops is a great beginner move to get you more acquainted with Plyometric Training.  All you need is a willingness to explore and learn, as well as about 4-feet sq. of space that you can move freely in.


  • Start by standing to one side of your space with feet hip-width apart.  Sit your hips back and down slightly, putting a small bend into your knees. 
  • Next, shift your weight onto your outside leg; the leg furthest away from the other side of your space.  Lift your inside foot off of the floor so that you are now standing on your outside leg solely.
  • Push off of your standing leg so that you move across your space and land softly on the opposite leg.  Secure your landing, bending softly into the ‘new’ outside leg.  Push off and return to where you started.
  • Try hopping across your space, side-to-side, for 60-seconds.  Take a short break then do it again. 
 

Skaters


Did you ever want to be an Olympic speed skater?  Me neither.  However, when I perform this Plyometric exercise I often change my mind.  Similar to the Side-Step Hops, which makes this a great transition, Skaters will challenge your hip, knee and ankle stability a little more, as well as stretch and power your quadriceps and glutes because you will bend your torso forward.  Let’s do this!


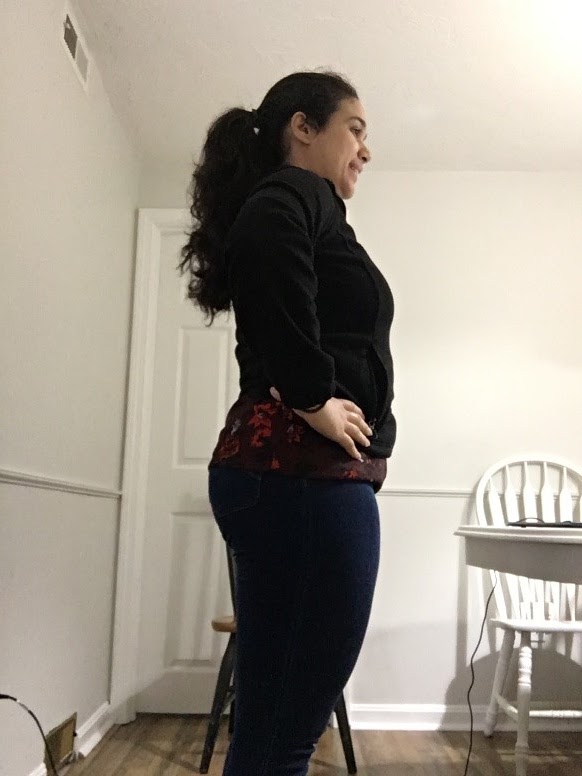
  • First, stand to one side of your space with bent knees.  Lift your inside foot up from the floor.  You will push off your standing leg and hop to the other side of your space, landing softly.  Lean your torso forward as if you are actually skating down the ice with purpose.
  • Keeping your torso down as you hop across your space, swing the leg that you pushed off of behind you, reaching across the backside of your body.  Think of an over-exaggerated Curtsy.  You may want to touch your toe down on the floor behind you as you learn this move to ensure steady balance. 
  • Bend you standing knee down and head on back to where you started.  Keep it going for 60-seconds.  Take a breather from all the skating and then get back on the ice for another minute.
  • Your arms may swing freely as you move from side to side.
 

Hopscotch


That’s right…Hopscotch!    Hopscotch is a perfect beginner/intermediate Plyometric exercise because it involves hopping.  There are several ways to increase the level of difficulty as you become more comfortable (i.e. get your Hopscotch rhythm back).

 
  • In your 4 sq. ft. of space, stand at the back, facing forward.  Place your feet hip width apart.  I encourage you to start slow as you learn/relearn basic Hopscotch moves. 
  • Begin moving by bending your knees and hopping forward slightly, landing on your left foot with a bent knee (keeping your right foot from touching the floor).  Be sure hops are only about 6”-12” in length.  You can choose how high you are comfortable hopping.  *Remember, start small and grow into bigger moves.
  • Hop forward from your left foot and land on your right foot with bent knee.  Be sure to keep your left foot lifted.
  • Hop forward from your right foot, this time landing on both feet, keeping knees bent. 
  • Repeat once more moving forward so that you move forward the entire time without stopping.
  • Lastly, facing forward still, try this going backwards.  If you are not comfortable with moving backwards then turn around and go forward, returning to your starting position. 
  • Hopscotch for 60-seconds.  Smile because of the memories for 30-seconds then go again.  Over time, hop a little higher (not longer) or quicker, begin sure to land softly with bend knees.
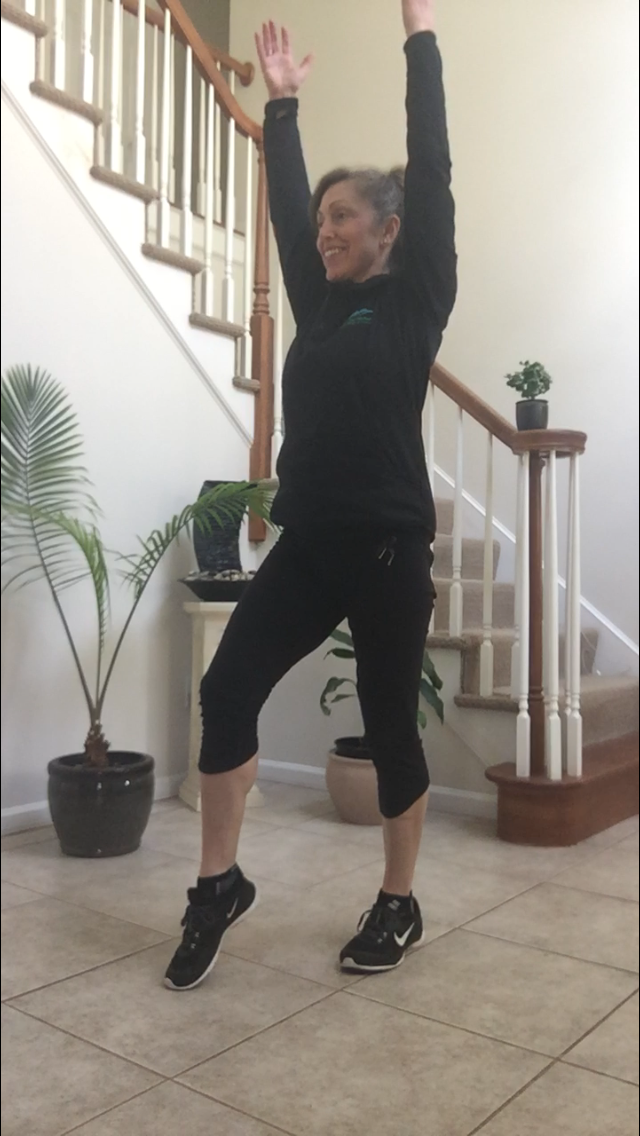
 

Squat Jumps


Though you may think that Squat Jumps sounds fairly simple, don’t be fulled.  However, this is a simple move, requiring less coordination than the others.  Squat Jumps will increase cardio and strength in your legs and hips like no other, especially as you grow into squatting down low, a more advance move (don’t feel like you must squat low to gain the benefits of this exercise, you don’t).


  • To begin, stand in your space with feet hip-width apart.  Make sure your toes face forward, or only slightly outward.
  • Starting bending your knees as you sit your hips back and down.  For beginners, I recommend only squatting down 1/4th of the way down until you build up enough flexibility to squat further down without sacrificing your form.  As you squat down, keep your shoulder back and chest lifted.  This improves your overall squat form as well as helping you maintain your balance for when you jump up.
  • Press down into your feet evenly to propel your body upward with force.  At first, try just coming up onto your toes instead of jumping.  This will help you sense your body’s response to leaping upward and coming back down.  Over time, begin lifting up completely, bringing your feet only an inch or a few inches off the ground.
  • Land softly, with bent knees and lower back down into your squat.  Repeat for 60-seconds going at a comfortable pace.  You may quicken your pace and the height of your jumps as you gain more familiarity and build strength, all the while maintaining good form.  Try 2 rounds of Squat Jumps, focusing on your form.
  • For your arms, as you squat down, reach your arms out in front of you.  When you jump upward, pull your arms into your body and a bit behind you to open your chest.
 
Whether you perform all 4 of the Plyometric exercises or start only using one of them, focus on building proper form.  This way, as you become stronger and move quicker, your form will be established and second nature.  Take your time and enjoy each move.  Using these exercises once per week will certainly be enough for you to see and feel their benefits.  Enjoy!
 
Blog post by Jami Woods.

Tuesday, December 1, 2020

How to Dress for Outdoor Fitness Classes this Winter

Temperatures may be dropping but fitness classes are continuing outdoors. Learn how to properly dress and prepare yourself for winter weather workouts.


Choose the right fabrics.


Who wore it better?
Who wore it better?
Some fabrics are designed to pull sweat, heat and moisture away from your skin allowing it to quickly evaporate and keep your body cool. Look for breathable, wicking materials like high quality polyester, polypropylene, wool and silk.
 
For example: Nike Dri-FIT, Under Armour ColdGear.
 
On the other hand, cotton fabric will absorb sweat and make your clothes feel wet and heavy. You also want to avoid fabrics that don’t breathe. Rubber-based or plastic-based materials will trap in your sweat and keep it from evaporating while simultaneously raising your body temperature.


Dress in layers.


The best way to stay warm and dry while exercising outdoors is to dress in layers. The number of layers worn will vary based on temperature, humidity levels, activity levels and personal preference. Your body generates a considerable amount of heat while exercising which can actually make it feel about 15-20 degrees warmer out then it actually is. It is important that you don’t overheat because that can lead to excess sweating and overheating. Layer up so once you warm up and start to sweat, you can start discarding layers. Once you start cooling down, put your layers back on to avoid getting too cold. 
 
There are 3 layers to consider:
  1. The Base Layer - The purpose of the base layer is to wick moisture away from your skin. The base layer is usually tight fitting in direct contact with the skin.
  2. The Mid Layer - The mid layer is to insulate and keep you warm. It should fit looser than the base layer, although it must remain in contact with the base layer to continue to carry moisture from the base layer to the outer layer.
  3. The Outer Layer - Finally, the outer layer is designed to allow moisture to escape while blocking wind and rain. Typical outer layers include waterproof and/or wind-resistant shell jackets with extra zippers and ventilation options.
 

Protect your head, hands and feet.


In cold weather your body can direct blood flow to your core leaving your hands and feet most vulnerable to the cold. Gloves or mittens and a good pair of socks is key.  A person can lose 7 to 10 percent of body heat through the head so you will also want a hat to help keep your body warm. Choosing the right fabric and layering also applies when talking about your head, hands and feet!


Don’t forget to hydrate.


Replenishing fluids is just as important in the winter as it is in the summer. We continue to lose fluids during cold weather exercise the same way we do in warmer weather. It’s easy to forget the need to hydrate in cooler and even freezing temperatures but your body is losing a lot of moisture trying to keep you warm. Pay attention to your body and drink plenty of water!


Workout clothing should feel comfortable. Choosing the right fabrics and layering up is necessary but too many of the wrong layers may feel bulky and restrict movement. Another thing to consider if you are running or biking, it is best to avoid wide leg or loose pants that could get tangled up in the pedals or your feet. 

Experiment with a variety of different layers and keep a log to keep track of the weather, what you wore and how you felt during class to make it easier to decide what to wear every morning. Good luck, have fun & stay safe!
 
Blog post by Jen Skiba.

Wednesday, July 1, 2020

Back To The Basics #1: Proper Execution of the Squat & Variations


The squat uses most of the major muscle groups in the legs including the glutes, hip flexors, quadriceps, hamstrings and even the muscles in the lover leg like the tibialis and muscles in the calf. It also activates the core, erector spinae and the abdominal muscles, for stability.

Before getting into your workout always remember to warm-up with some movements that increase the heartrate slowly and get blood and oxygen out to the muscles preparing the body before executing the exercises. After completing your workout, end with stretching the muscles used in the workout. Warm-up and cool-down may take 5-15 minutes, depending on age and fitness level. Make sure that you are mindful and present when executing the movements. Never move into any new pain. Always start small and work into larger range of motions building up to your full range in the motion to help prevent injury. Once you are warmed up let’s get started!

Stationary Squat


Start by standing with feet parallel and hip to shoulder-width apart. Keep a straight line from the crown of the head to the tailbone and from shoulder to shoulder. With core engaged move hips back transferring weight into the heels. Keep knees behind the toes and lower the hips. Arms may extend forward for balance. Press through the heels to return to a standing position.


Too Difficult?... add a chair.


Place a sturdy chair behind you making sure that it is secure and will not slip. Start by standing with feet parallel and hip to shoulder-width apart. Keep a straight line from the crown of the head to the tailbone and from shoulder to shoulder. With core engaged move hips back transferring weight into the heels. Keep knees behind the toes and lower the hips to touch down as if going to have a seat in the chair. Arms may extend forward for balance. Press through the heels and return to standing a position.


Too Easy? … add overloading one leg.


With arms overhead and palms facing each other, raise one heel off the ground to the ball of the foot or extend one leg straight with heel on the floor, overloading opposite leg as if a single leg squat. With core engaged move hips back transferring weight into the heel of the overloaded leg. Keep the knee behind the toes and lower hips. Arms may extend forward for balance or remain overhead. Press through the heel to return to a standing position.


Squat Down & Reach Up Variation


Start by standing with feet parallel and hip to shoulder-width apart. Keep a straight line from the crown of the head to the tailbone and from shoulder to shoulder. With core engaged move the hips back transferring weight into the heels. Keep knees behind the toes and lower hips. Reach fingers down toward the ground. Fingers may touch the ground for a deeper squat. Press through the heels to return to standing position. After returning to standing position, raise up on toes lifting heels off the ground and raising arms overhead for additional balance challenge and range of motion.


Too Easy? … add plyometrics


Start by standing with feet parallel and hip to shoulder-width apart. Keep a straight line from the crown of the head to the tailbone and from shoulder to shoulder. With core engaged move the hips back transferring weight into the heels. Keep knees behind the toes and lower hips. Reach fingers down toward the ground. Fingers may touch the ground for a deeper squat. Press through the heels, raising arms overhead accelerating up adding power to create a jump off the ground then decelerate, controlling the landing and easing back into the squat.


Blog post by Ally Wilson.

Monday, June 15, 2020

Working from Home: Pandemic Edition Part 2


Many Americans recently saw a change in their daily work routine. With the current stay-at-home advisory extended, many of us are working or attending school from home. In a previous blog, we talked about how prolonged sitting can have negative short-term and long-term effects on the body. We went over sitting posture at a desk, muscle groups affected by sitting, and the American College of Sports Medicine’s recommended activity levels. If you have not read it, go check it out

In today’s blog post, we will go over a few stretches that you can do to combat the short-term effects of sitting. Stretches should be done every 1-2 hours.


Standing Back Extension


Stand with your feet about hip-width apart, place hands on your hips. Bend backwards slightly. Return to starting position. Repeat this 10 times. This exercise is not for you if you have spondylolisthesis, spondylosis, or nerve pain/leg pain that worsens with each repetition.


Burdenko Sitting and Head Turning (Modified)


Begin sitting on stable chair. Place your hands behind your head, elbows are up and turned out. Simultaneously stretch your arms out to the sides as you turn and look to the right. Return to starting position. Repeat on the left side. Repeat this 10 times on each side. Be careful if you have any shoulder limitations/injuries, or neck limitations.


Burdenko Bench On/Off Stretch


Start sitting upright in a chair, facing a second chair. Lift one leg up onto the chair in front of you and reach for it with the opposite hand. Return to starting position. Repeat on the other leg. Return to starting position. If you can, lift both legs up simultaneously (back should be neutral), and reach for your feet with both hands. Repeat 5-10 times each side. This will stretch your hamstrings. If you have a preferred hamstring stretch, go ahead and do that instead.


Seated Hip Flexor Stretch


Sit with half your buttocks on the chair, support your self with your arm. Stretch the leg that is “hanging” off the edge back until you feel a light stretch along the front of your hip. Hold for 20 seconds. Repeat 3 times on each side.


Interested in more exercises related to posture? Check out this blog post: https://mashpeefitness.blogspot.com/2015/03/5-quick-exercises-to-help-correct-poor.html

Blog post by Damaris Marques PT DPT.


About Damaris Marques PT DPT
Damaris ("Dee") joined Cape Cod Rehab in August 2017 after receiving both her Doctor of Physical Therapy and Bachelor of Science from Springfield College. She is certified in Part I and Part II of the Burdenko Method and believes in a patient-therapist partnership where both are working together to meet the patient's functional goals. Dee is bilingual (English and Brazilian Portuguese) and lists crocheting as a hobby along with singing and a little dancing when no one is looking!

Wednesday, June 3, 2020

Working from Home: Pandemic Edition Part 1


Many Americans recently saw a change in their daily work routine. With the current stay-at-home advisory extended, many of us are working, or attending school, from home. We do not know when we will be able to go back to “normal.” So, for now we find ourselves mostly at home, and if you are anything like me, you are sitting for most of the day.

While sitting may seem like a harmless activity, it can cause both short-term and long-term problems. A small research study1 looked at the effects of prolonged sitting (2 hours) on the stiffness of the spine, and found that in university-age men, stiffness of the spine increased after only 1 hour of sitting, whereas in women it varied in the 2 hour window. The reality is that many of us are sitting for longer than 2 hours. Chronic prolonged sitting can be detrimental to your long-term health. In a recent study2, researchers found that sitting for long hours (usually 6+ hours) is associated with all-cause and cardiovascular disease mortality risk in sedentary adults, but this association is decreased or completely undone when the recommended levels of weekly moderate/vigorous exercise are met.

What does this tell us? That prolonged sitting today can cause problems both today and tomorrow. Here are 3 tips to combat the risks associated with prolonged sitting.

1: Office Ergonomics


Some basics: Sit up with your back supported, use a lumbar roll or a towel roll along the small of your back for support. Elbows should be approximately 90 degrees, with wrists in a neutral position. Your neck should be held in a neutral position (ears aligned with your shoulders; shoulders set back). Ideally, have your monitor set up to eye level.


Knees should be approximately 90 degrees, and feet should rest comfortably on the ground. Use a phone book (or your pathology book from college) to adjust the “height” of the floor if you are short like me.


If you are using a laptop, try angling the laptop to help with the eye level. This is not ideal.


2: Take Stretch Breaks


Sitting keeps the hamstrings, hip flexors, chest musculature, and neck extensors short and tight, while it lengthens and weakens the quadriceps, neck flexors, and upper back/shoulder blade musculature. Get out of that seated position every 1-2 hours to stretch out and walk around the house. Some people have standing desks. If that is you, use that to your advantage. Otherwise, stretch the chest and squeeze your shoulders back, stretch your hamstrings and your hip flexors, and do a lap around the house.

In our next blog post about working from home, we will go over more specific stretches to do at home.


3: Hit the Recommended Activity Levels


Regardless of how long you sit for, regular moderate to vigorous activity is still the best way to combat long term health issues associated with chronic prolonged sitting.

For most adults, the America College of Sports Medicine recommends 150-300 minutes of moderate-intensity aerobic activity per week, or 75-150 minutes of vigorous-intensity aerobic activity per week, and 2 or more days per week of strength training of all major muscle groups of the body.

Similarly, older adults should engage in 150-300 minutes of moderate-intensity activity, and this should include a mix of aerobic training, strength training, and balance training. Older adults should also take special consideration of any co-occurring conditions. Remember to always consult with your physician or physical therapist when starting a new exercise program.

Here are some ideas of aerobic activities: walking around the neighborhood, hiking along the beautiful trails of Cape Cod, walking on the beach, a light jog or run outside, body-weight circuit training, bike riding, roller blading, jumping rope, dancing/aerobic dance to name a few. If you need some help getting started, or feel most motivated when working with others, check out our offering of FitPlan Live VIRTUAL classes at Mashpee Fitness.

I hope you find these tips helpful. Keep an eye out for the next blog!

Blog post by Damaris Marques PT DPT.


About Damaris Marques PT DPT
Damaris ("Dee") joined Cape Cod Rehab in August 2017 after receiving both her Doctor of Physical Therapy and Bachelor of Science from Springfield College. She is certified in Part I and Part II of the Burdenko Method and believes in a patient-therapist partnership where both are working together to meet the patient's functional goals. Dee is bilingual (English and Brazilian Portuguese) and lists crocheting as a hobby along with singing and a little dancing when no one is looking!

References
1. Beach TA, Parkinson RJ, Stothart JP, Callaghan JP. Effects of prolonged sitting on the passive flexion stiffness of the in vivo lumbar spine. Spine J. 2005 Mar-Apr;5(2):145-54.
2. Stamatakis E, Gale J, Bauman A, Ekelund U, Hamer M, Ding D. Sitting Time, Physical Activity, and Risk of Mortality in Adults. J Am Coll Cardiol. 2019 Apr 30;73(16):2062-2072. doi: 10.1016/j.jacc.2019.02.031.
Resources
2. Link to the Physical Activity Guidelines for Americans: https://health.gov/our-work/physical-activity/current-guidelines

Monday, May 18, 2020

Sand Training Part 1: Ladder Agility Drills


Cape Cod offers us some of the world’s best beaches and with almost 560 miles of coastline we can use these beaches to take our agility workouts to the next level.

Although research varies, training on sandy surfaces can have many benefits such as reduced impact during training on your joint surfaces, increased physical and metabolic demands, and increasing proprioception (understanding where your body is in time and space).

It is also important to understand that due to the unstable surface ground force production changes and alterations in form may occur. Some research has proven that sprint times have been shown to actually decrease due to altered running mechanics. It is highly important to start slow and to maintain proper body alignment if you want to reap the most benefit from your workout.

Clients should be primarily focused on explosiveness and strength of the movements as this is where the majority of benefits can be gained. With the exercises below, we are going to focus on Ladder Agility Drills that can improve lower body agility and explosiveness.

Forward 2 Feet In Each

Moving straight through the ladder quickly get both feet into a box before moving to the next one.


Lateral 2 Feet In Each

Moving to the right through the ladder quickly get both feet into a box before moving to the next one. Return back to the left.


Diagonal 2 Feet In, 1 Foot Out “Icky Shuffle”

Start with both feet out of the ladder to the right, step in with the left foot then the right foot as you cross to the other side of the ladder, touch the left foot outside of the ladder and return back touching right foot then left foot back into the ladder.


Lateral Step In, Step Outs

Leading with the left foot alternate stepping feet into the ladder and out of the ladder as you move to the left. Return back to the right leading with the right foot.


2 Feet Out, 1 Foot Cross Behind “Scorpion”

Stepping in place take your outside leg and swing it behind your body and tap the foot inside of the ladder as you move forward along the outside of the ladder.


Single Leg In Outs

Starting outside of the ladder on your left leg, perform single leg hop in and out of the ladder as you move forward. Return back on the right leg.


Single Leg Hop & Squat

Alternate performing a single leg hop into the ladder to hopping onto both feet outside of the ladder and performing a squat, return back into the ladder on the opposite leg.


Blog post by Craig Moody.

Wednesday, May 13, 2020

Top 3 Yoga Stretches for Tight Hips


If you are like me, someone who enjoys exercising on a regularly, if not on a daily basis, you may discover that you often feel tightness in your hips, hamstrings, and hip flexors.  Even if you do not exercise consistently, maybe you have a job that requires sitting, bending, or kneeling often, you are also subject to feeling stress in the central area of your body.  These muscles, these forever active muscles, are too often the cause of several ailments and set-backs to living an active and healthy life.

Going back to my exercising counterparts, the tightness you may experience in the upper section of your legs, lower back and abdomen areas, may lead to your not performing as well as you could with more flexible hips.  Because our hamstrings, major glutes and hip flexors tend to work in unison during activity it is extremely important that you take the time to tend to these areas with intention to keep them healthy, long-lasting and able to perform on the ready.

Each person may carry a lot of emotional stress in their hips.  Think about it. When we are sad, frustrated, or just feel ‘blah’ we tend to slump, slouch, sit or lay in awkward positions that place high demands on the areas of focus here.  Our low back curves excessively because we forget about keeping it even.  Our shoulders slouch forward as we forget to keep them back.  Our hips, well forget about it.  Our hips take on the demand of our torso weight in these unaligned positions.  This is how emotions cause stress on our body.  Emotions cause us to misalign our bodies or, on the more positive side, keep our bodies upright and in good form.  Everything we do impacts our hips. 

There are 3 exercises that you can do at home that will help any person, athlete or not, keep hips strong, flexible, and ready to take on the excessive demands of life so that injuries may be prevented, thwarted by the habit of maintaining good posture naturally, even during times we forget about our alignment.  We need to build muscle memory and these 3 exercises, added into your life regularly will help.

Child’s Pose


This relaxing posture is designed to stretch your hips, lower back and upper parts of the back of your legs.  Child’s Pose also, depending on the version of the pose, may help lengthen your side body and open your shoulders (when arms are extended out in front). 


  • First, come down onto your knees.  (If you have knee problems, place pillows underneath or perform this exercise lying on your back instead.  Just follow the same instructions).  Move your knees outward until they are a bit wider than your hips. 
  • Next, bring your BIG toes together.  This creates a base for your hips to sit back into, as well as ensure you stretch the appropriate muscles. 
  • After this, sit your hips back, toward your heels.  Some may be able to touch hips to heels while others may not.  It isn’t important to get your hips all the way down to your heels.  What is important is knowing your body’s limits and respecting them.
  • Lastly, once your find a comfortable placement for your hips, lean your torso forward, over your thighs.  The goal is not to get your torso all the way down to the floor.  In fact, if you are a beginner to this pose you most likely will not be able.  The goal is, however, to relax and try to keep your spine nice and long (no bending the spine).  To accomplish this, either come onto your forearms with your elbows under your wrist, or place a pillow or block beneath your forehead as you keep your chin slightly tucked to your chest.  Keeping your spine long will help you get a deeper stretch through your hips, glutes, low back and beyond.
  • Variations: Extend your arms our in-front of you with palms facing down to open shoulders, or bring your arms to your sides and truly relax into the posture.  Stay here for 3-5 minutes. 

Wide-legged Forward Bend


This is one of my favorite stretches because there are so many variations that help open those tight muscles even more.


  • First, step your feet out to the sides of your body, nice and wide.  Be sure not to step out so wide that you cannot keep your balance.  Keep your toes facing forward, pressing the outside of your feet down into the floor.  Squeeze your thigh muscles to keep your legs strong.
  • Next, standing with wide legs, tuck your pelvic bone by drawing your navel into your spine, sending your buttocks flesh downward to help flatten your lower back, protecting it from bending.
  • Moving on, squeeze your shoulder-blades into one another so that your chest pushes forward.  Now you are ready to bend.
  • From here, keeping your spine long, lean your torso forward, bending at your hips and not your waist.  Bring your torso down until parallel to the floor if possible.  (If not, only bend down to where you can keep a long spine and stay there.  Over time your muscles will stretch and you will be able to be parallel to the floor.  Don’t rush this process as it may lead to straining the muscles). 
  • Remember to keep pressing into the outside of your feet while you bend forward.
  • Lastly, if you are parallel to the floor, stay here for 30-seconds before slowly coming back upward to stand.  Keep your spine nice and long to get maximum benefit.  Repeat this slowly 5-10 times, remembering to pull shoulder blades into the spine while keeping pelvic bone tilted. 

Frog Pose


This is one of those stretches that you love to hate, hate to love, though the benefits of Frog Pose are absolutely wonderful for your tight hips.  You will want to give yourself enough time to really sit in this stretch for at least 3-minutes, gradually increasing to 5, 7, or even 10-minutes.  Frog Pose should be the last stretch you do if you are following this series of stretches.  This is not a comfortable stretch at first.  However, if you are willing to sit in this stretch you will find that the deep muscles of your hips will want to open and stretch, creating space in your hip joints.  I encourage all of my students to focus on steady breathing through the stretch to keep your mind off of the discomfort this may cause. 


  • To begin Frog Pose you will need to come onto all 4s on the floor.  For those with knee issues I recommend placing padding or pillows under your knees.  You will NOT be directly on your kneecaps but you will be on the medial (inside) part of the knee.
  • Start with your hips directly over your knees.  Come onto your forearms, shoulder directly over elbows. 
  • Make sure your feet are turned outward with your heels in-line with your knees.  Your legs create two 90 degree angles (hips/knees & lower knees/turned out toes). 
  • Slowly move your knees outward, maintaining alignment with your hips.  Your knees should move directly out to the sides, not forward or back.  Check to be sure you are maintaining two 90 degree angles in your legs. 
  • As you move your knees outward, draw your navel (belly button) up toward your spine slightly to keep your lower back from sagging too much.
  • Lastly, once you have moved your knees out as wide as you can, knowing this in and of itself may become uncomfortable for you at first as you stretch the inner part of your upper legs, slowly shift your torso and hips slightly back between your legs just to break the plane, causing your hips to be back further than your knees.  (!!Be sure not to sit your hips back too far.  This is only a slight movement back).  Once here, stay as long as you can.  Just don’t forget to breathe!


When performed correctly, each of these stretches has great potential to help you open your hips, relieving stress in tight muscles around the middle-section of your body, thus allowing you to continue move forward with your life, your exercise program, or whatever it is that keeps you going.  As with any exercise or stretch, if you experience pain in the joints or tearing than back out of the position until the sensation is gone.  Let this be your starting position and grow from there.  I encourage you to try these at least once each week, maybe more.  Over time the benefits begin to reveal themselves as you feel looser in your movements, less tightness and more mobility.  Enjoy!

Blog post by Jami Woods.